The Power of Light and Shadow in Cinematography

It would make sense that lighting a subject would involve aiming a light at the subject and turning the light on.  While this rather direct approach works some of the time, it often makes harsh shadows and creates a very unnatural look, especially when that light is the key light.

Remember that good lighting involves making shadows, provided those shadows are in the right place. In real life, we humans are able to determine depth and distance because we have two eyes. Our eyes work together, each one seeing an object from a slightly different angle.  When our brain puts these two images together, we are able to see depth. This process, called triangulation, helps us determine the distance between objects or the distance from an object to our face. Incidentally, the closer an object is to our eyes, the more depth sensitive we are and the farther away it is, the more difficult it is to determine depth.  For example, if you hold your finger at arms length and move it 12 inches toward your face, your brain will detect that change in distance much more than if a friend, standing 100 feet away, moves his finger 12 inches closer to you.

It is for the same reason that it is difficult to tell how far away stars are relative to each other. The angle between the stars to our left eye and the stars to our right eye is so narrow, that we can’t tell how far away they are from us, or from each other.

Unfortunately, a camera doesn’t have depth perception because it only has “one eye…” the lens. So, in order to create depth, you have to use shadows, and shadows are created by lighting.

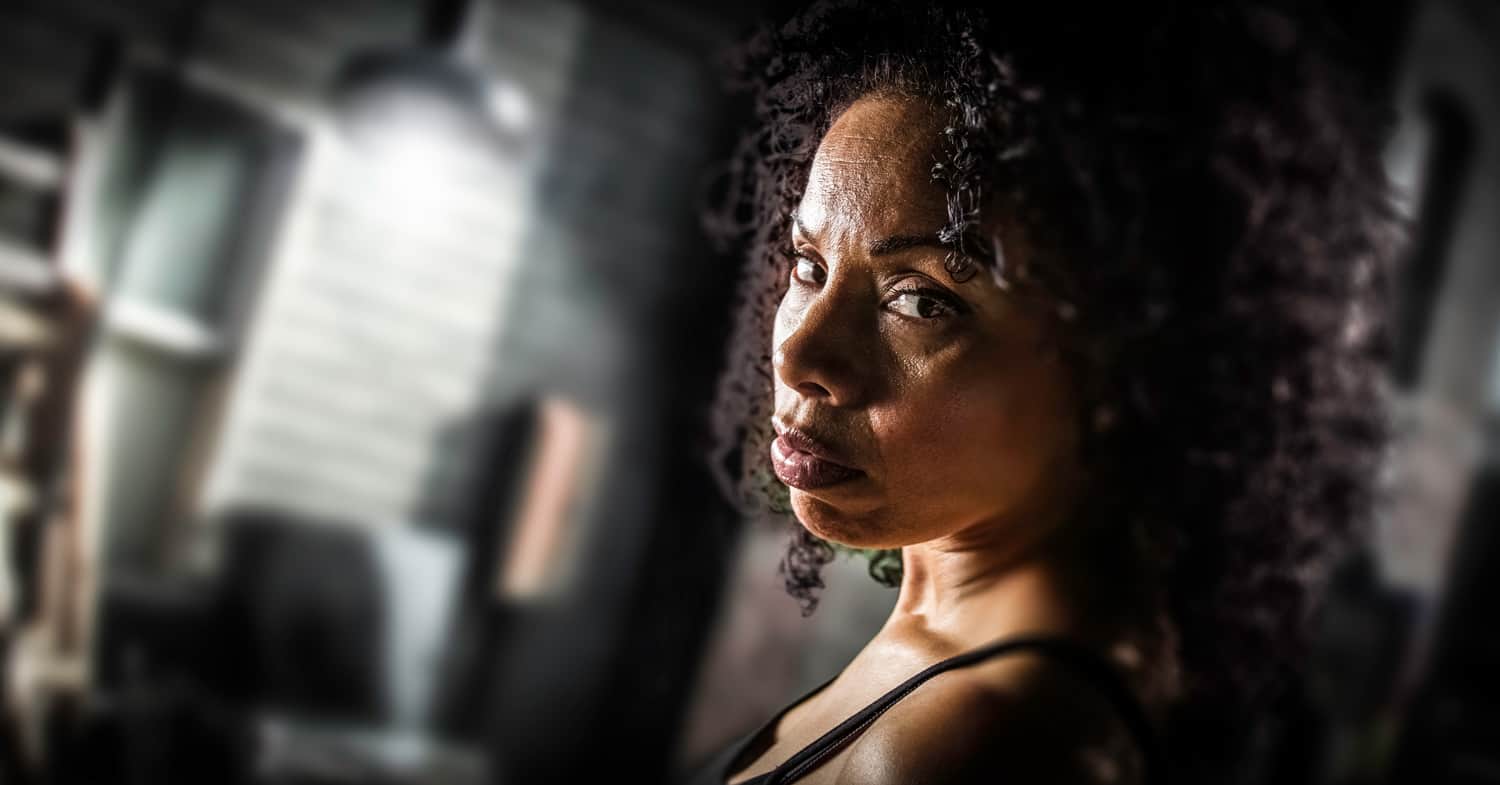
There are good shadows and bad shadows. Bad shadows are created when a light casts a harsh shadow of the subject onto the background, which draws the audience’s attention to the presence of the light.  Good shadows are created by proper light placement, resulting in contrast… one side of the subject is brighter than the other.  Instead of shadows being cast on the background, shadows are created by the object itself, on itself, like the earth and the sun.  One side of the planet is always in the light and the other side is always in shadow.

The transition between the bright and dark sides of a subject’s face is called the “wrap around.” A harsh, distinctive line between the bright and dark sides of a subject’s face is called a hard wraparound, whereas a soft, transition from dark to light is a soft wraparound.  Famous female movie stars of the 1940’s and 1950’s look glamorous because of soft wraparound.

You can create a soft wraparound by increasing the size of the light source – by adding a large diffusion in front of the light, reflecting light off a white piece of foam core (available at an office supply store), wall or other reflective surface. The larger the light source and the closer to the subject, the softer the wrap around. Learning these lighting techniques will greatly improve the quality of the movie image.

The Sun – A Cinematographer’s Biggest Light Source

Summertime is finally here, and so are challenges of shooting outdoors in the harsh summer sun. Although the winter months provide us with plenty of diffused cloud cover to properly expose out actors, the harsh, direct summer sun can be problematic when the light and shadows fall outside the contrast ratio of the camera.

In working with the sun, treat it in the same way you’d treat the key or rim light. The only difference is that you need to move the subject and camera to position the sun in the ideal location. Many times, locations are selected because of their east-west orientation, enabling the Director of Photography and 1st assistant director to schedule specific shots based on the sun’s position.

Working with sunlight begins by choosing the position of the subject relative to the position of the sun. There are two ways to approach shooting using the sun as the primary light source:

  • Use the sun as the key light – Position the actor so the sun is illuminating the far side of the actor’s face, opposite the actor’s eye line. This is much easier to do before 11:00 AM and after 4:00 PM, when the sun hangs lower in the sky. Avoid shooting near noon, because the sun tends to cast shadows on the actor’s brow, creating deep, cavernous shadows over the actor’s eyes. Use a bounce board to fill in some of the shadows, especially if the sun is too direct.
  • Use the sun as a rim light – Position the actor so the sun is positioned behind her, then use a bounce board or reflector to bounce the sunlight as the key light. I would recommend using a silver reflector available at most camera stores.

Here are some tips for getting a great shot in direct sunlight:

  • How much workable daylight is there – The 1st assistant director will look at the script and estimate the amount of time needed to shoot a particular scene, or to shoot all the scenes at one given location. He will then determine whether there is enough workable sunlight to be able to complete your shot list.
  • How much time will it take to chase the sun – Chasing the sun is a term that refers to the constant adjustments to the grip equipment needed to compensate for the sun’s movement. Reflectors, diffusion and overheads all need to be moved, which takes time and manpower. The schedule will determine whether the day will permit extensive rigging changes.
  • Are there geological or architectural features that will cut into the sunlight – Sunlight calculators provide sunset and sunrise times based on the moment the sun crests the horizon to the time the sun dips below the horizon. The actual time may vary if the sun travels behind a building or a mountain range. Often, location scouts will perform a light survey, during which they sit at a location all day and note the exact times of direct sunlight. These times are important to know when determining the daily shooting schedule.
  • Plan for lighting changes – A good director of photography will be able to plan not only camera angles to allow a consistent look of the lighting throughout the day, but determine a way to shape the changing sunlight so the look of the final footage is consistent in the scene. Often this involves flying a large 20’x20’ silk over the set so direct sunlight is diffused, then focusing the direction of the sunlight with shiny boards.
  • Be prepared for weather changes – Even the best-laid plans are subject to a cloudy day, where overcast conditions make it much more difficult to reflect light. Instead of bouncing light to increase the illumination levels on one side of your subject, DPs will use solids to reduce the light, creating negative fill on the opposite side of the actor. Whether you add light to one side or subtract light from the other, the goal is to create a consistent contrast ratio from shot to shot.
  • Make sure you have room to rig – Reflectors and overheads can take up a lot of space, so when scouting a location, make sure there is ample room to rig the necessary fixtures. Sometimes, it becomes necessary to place reflectors on nearby building rooftops, or rig overhead silks to a neighboring structure. Be sure to discuss these requirements with the location manager so she can secure all necessary permissions and permits from surrounding property owners.

Remember, the sun is a giant light source that can be diffused, bounced, reflected and blocked. With a little creativity, you can help shape sunlight to create the best possible image for your production.