Writing a Great Low Budget Screenplay

It’s easy to get lost in the world of your story, weaving tales of intrigue, romance, action and adventure through the lives of your characters. But as engaging as you would like that world to be, the reality of tighter budgets, fewer shooting days, smaller crews and cheaper equipment force producers to look at cheaper scripts. As a writer, it’s important to learn the balance between the story and the cost of producing it.

One of the biggest strengths you can have as a writer it to learn how to attach a price tag to each scene. Here are some pointers when writing on a budget:

  • Focus on story – not on the scale of production – Emotion is the most powerful tool you have when building a low-budget story, and the great news is that it’s free!  When you develop your project, focus on the characters, creating a conflict that inflicts as much pain on them as possible, and set-up the story to invoke an emotional journey for the audience.  Emotion will have a more powerful impact than a cast of thousands or Earth-shattering visual effects.
  • If you’re shooting a feature, keep your script at 85 pages – If one scripted page (properly formatted, of course) equals one minute of screen time, then keeping your script length down means you can concentrate your budget.  A feature film that is 85 minutes will actually sell just as easily as a 120 minute film.
  • Car scenes can be expensive – Building car rigs, or renting a process trailer to tow the hero car around is expensive, so whenever possible, write scenes that take place in a stationary car, or have your characters get out of the car and continue the conversation at their destination (or pulled over).
  • Keep your cast small – Although we would all love to have a cast of thousands, the most budget-friendly scripts have only a handful of actors.Take Shane Carruth’s “Primer,” a mind-blowing science-fiction time travel film shot for less than $10,000 with just a few actors.
  • Reduce the number of locations – You won’t just save money in location fees and permits, but time.  Each time you need to pack up the cast, crew, and equipment for another location takes valuable time out of your shooting day. Many low budget movies shoot at one location – a cabin in the woods, an abandoned building, one house.
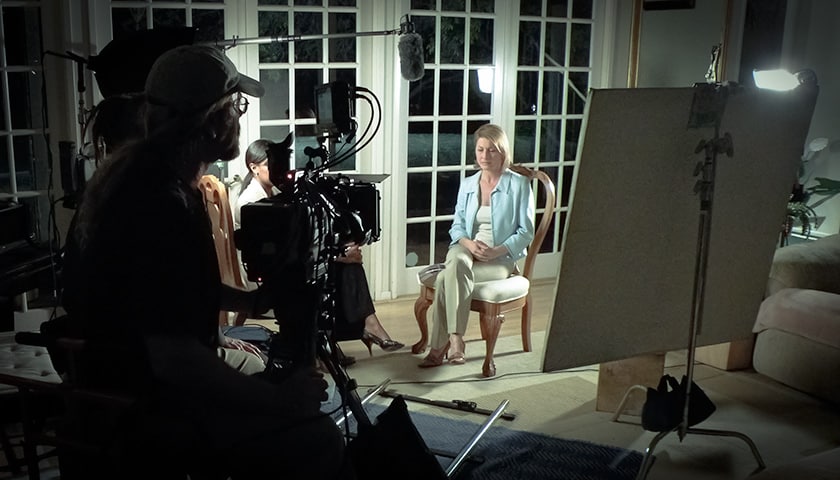
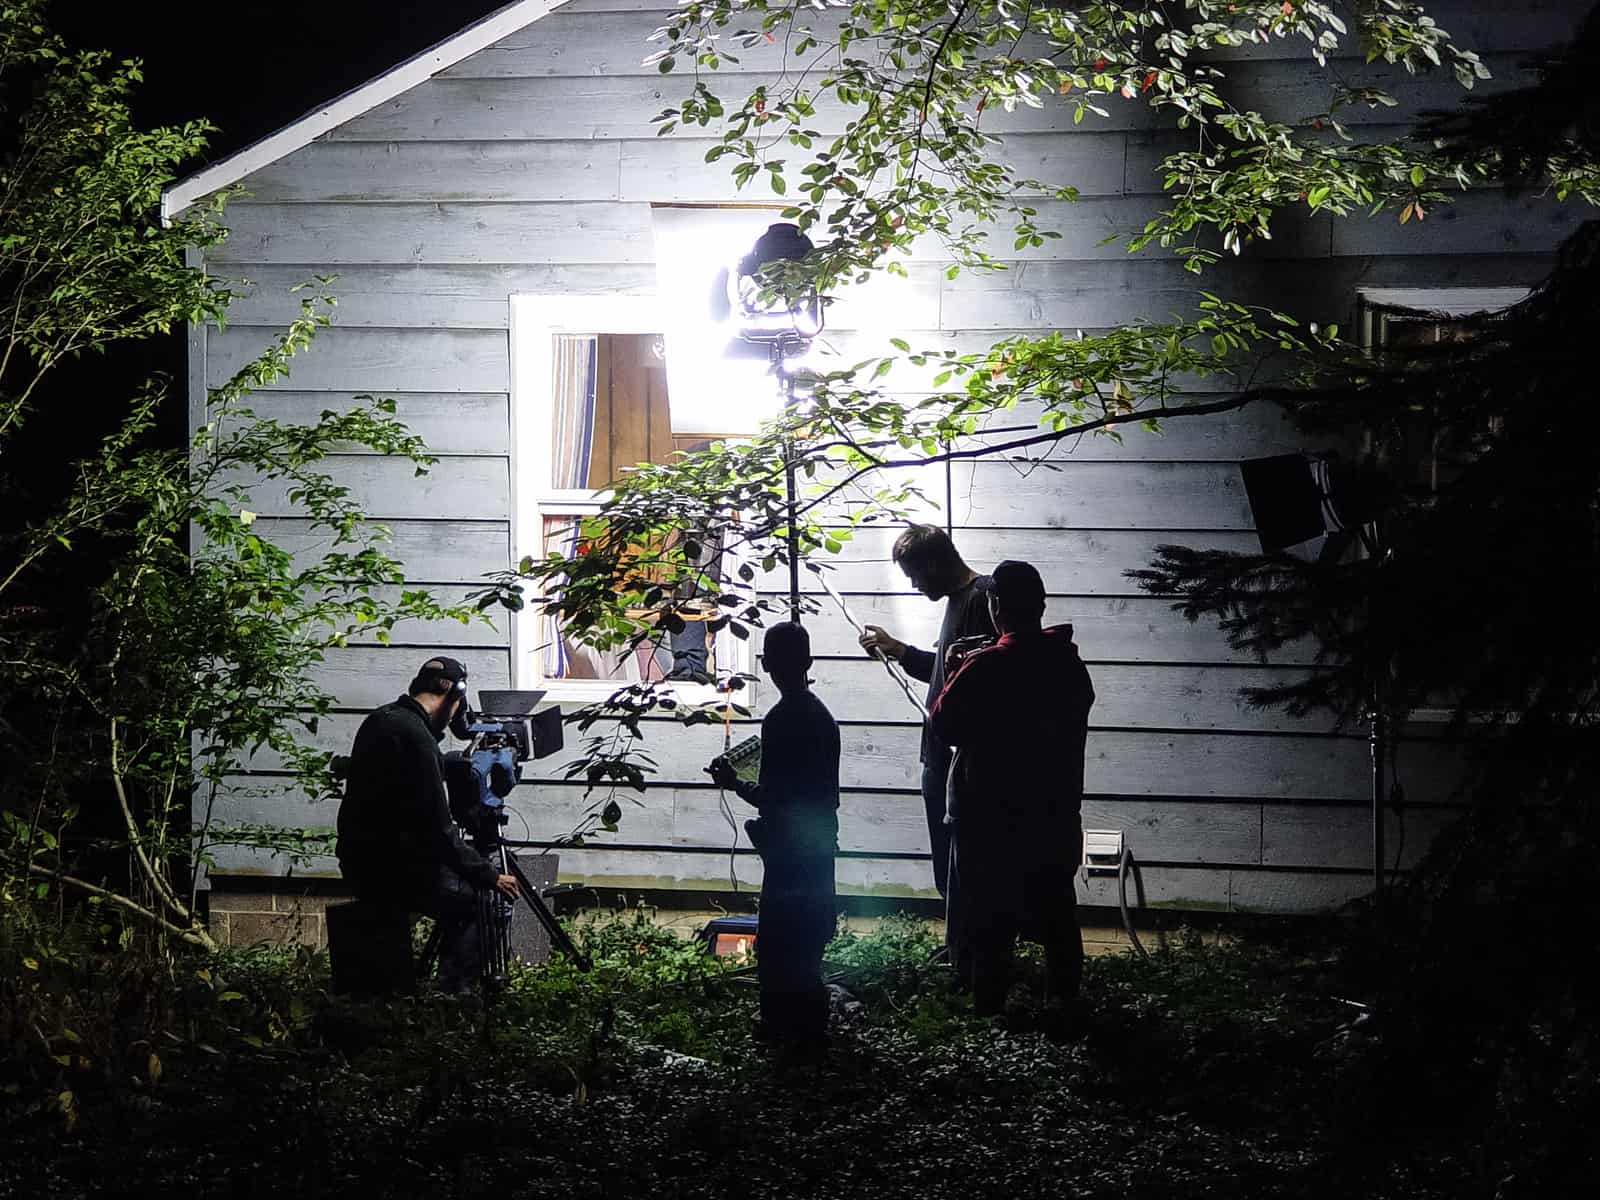
  • Avoid night exteriors – Contrary to what you may expect, shooting at night requires a lot of light, generators and crew. A forest at night is dark, and it’s impossible to get an image, even under a full moon, so massive 18,000 watt HMI lights are positioned hundreds of feet away to simulate moonlight, while the areas of the forest in which the action takes place must also be specifically lit so the cinematographer can properly expose the actors. When in doubt, write exterior scenes for daytime.
  • Special effects take time – Even though you may have access to the best make-up effects artist from Stan Winston Studios, or a top ILM visual effects supervisor, know that on-set effects take time… lots of time. And on set, time costs money, so be aware that some producers may cut effect-s heavy sequences to accommodate the budget.

All in all, producers are always looking for next script to produce. And almost as important as the quality of the story is the price tag that comes with the script. Writing for the producer can greatly increase the chances that your script will sell.

Pro-Tip: Check out the site InkTip.com.  It’s a script brokering site that allows writers to post scripts, then vetted producers can review scripts, treatments, and outlines. Hundreds of scripts have been bought and sold over the years, and it’s a great place to either shop your script, or find a  great script for your project.

How to Block Actors On Set

Blocking actors is one of the main responsibilities of the director. The term blocking refers to the actors’ movements on set. We like to break blocking down into two stages – macroblocking and  microblocking. Macroblocking are the large movements an actor makes– where does he walk, where does he stop, where does he sit, when does he stand? Conversely, microblocking are small personal movements– opening of the newspaper, adjusting eyeglasses, taking a sip from the coffee mug. The balance is a dance between macro and microblocking is what creates a believable performance.

Of course the director is going to have an idea in his head how he thinks the actors are going to move with in the space, because he has been a part of the set design, where the furniture is placed, and that stuff. But I think it’s a good idea to put the characters in the space and see how they move in the space and how the tensions of the scene dictate their movements and where they move. Explore that a couple of times before you lock it in.

– Angela Nicholas – Actress, Deadwood

Choose the Best Camera for Documentary Filmmaking

Over the past decade, cameras have empowered filmmakers with higher resolutions, better optics, and smaller camera bodies, making them easier to carry and use in the field. But, with all the options available, what cameras should you choose? Although larger cameras can shoot better images, smaller cameras are ideal in the field since they don’t draw attention to themselves.

The good news is, people want to obsess about the camera, I don’t know necessarily it’s about the camera. It’s about the eye behind the camera, the brain behind the camera, so pretty much you can shoot documentaries, good documentaries on any camera as long as the camera is rolling and is in the right place. It’s just getting easier now because [the cameras] are getting smaller, and we don’t have to shoot film and we can edit it at home, and all that stuff. That’s the really good news.

– Dana Kupper, Cinematography, “The New Americans,” “The Trials of Muhammad Ali,” “On Beauty,” and “In the Game”

There are several factors to consider when picking a camera:

  • What is the resolution and acquisition format? – Always consider how the film will be exhibited and what format distributors will require. Many cameras today easily meet distribution requirements when shot in 1080p HD, however some distributors prefer certain CODECs over others.  For example, some broadcast stations will not accept HDV for the overly compressed signal.
  • Can it be easily packed and traveled with? – If you’re traveling on the road or by air, smaller cameras can be carried in carry-on luggage much easier than larger ENG-style cameras.
  • Will the size of the camera matter in the environment in which you’re shooting? – Are you shooting in a dangerous setting – a riot, politically unstable country or a theft-prone area? The smaller the camera, the easier it will be to fade into the background.
  • Will you need to purchase and carry multiple cameras for interviews or to split off separate teams?  GoPros, and even off-the-shelf cameras can be used to capture broadcast-quality footage, enabling you to use multiple cameras on a small budget.
  • On what type of media does the camera shoot? – The choice between tape and solid state matters depending on your shooting environment. Cameras that record to solid state media such as P2 cards, SD, and CF cards do not have any moving parts like their older tape-based cameras.  Solid state cameras can function better in extreme conditions with more reliable functionality.

How to Be an Effective Director in Post Production

Once a movie is complete and enters the post production phase, the director is usually exhausted and may be disappointed with the results of the footage. It’s rare in the independent world for a director to have achieved her exact vision due to time and budget restrictions. By this point in the process, it is best for the director to find a fresh editor who isn’t familiar with the movie to bring an objective eye to the project. The director should sit down with the editor and talk about her vision and the tone, style, and pacing of the movie and then leave the editor to assemble a cut of the movie on his own.

Many directors are afraid of losing control of the film by turning it over to an editor. Holding the reins too tightly is a mistake because the director is carrying a lot of baggage; she knows what scenes she likes, what scenes didn’t turn out; she knows what performances were difficult to get, what shots were time consuming to shoot; each shot is full of emotion, blood, sweat, and tears. This emotional attachment makes it difficult for the director to separate herself from the footage to assemble the shots objectively into a cohesive, well-paced story. The editor doesn’t have this emotional connection to the material and is confronted with the task of looking at the available footage and assembling it in a way that best serves the story. The director should allow him the time to do this while he relaxes and clears his mind so when an assembly cut is ready, the director can view it with fresh eyes.

  • Communicate your vision to the editor in the same manner as you would with an actor. Discuss each scene, what you want it to accomplish, how you envision the tone, style, and pacing.
  • Be open to ideas and suggestions from the editor. He is seeing the footage with fresh eyes and may have a perspective you haven’t considered yet.
  • Relax and let the editor do his job. You’re probably tired and emotionally charged from the shoot itself, so take the time to get away from the project and clear your mind while the editor builds the first assembly cut.
  • After the cut is finished, work with the editor to refine and tweak the edit until you are happy with the pacing and flow of the story.
  • Confer with others to get objective opinions throughout the editing process, but be careful which advice you listen to. Everyone will have an opinion, but not everyone will be right.

Refer to the postproduction chapters for more information on the editing process, working with composers, adding digital effects, and the audio postproduction process.


Unlock the Most Powerful Acting Tool – Backstory

A play, story, or movie is nothing more than a short glimpse of a part of a character’s life in a moment of conflict. The audience does not have the luxury of knowing the character from birth, so personality and behavioral traits, quirks, likes and dislikes, and temperaments must be derived during the short time the audience watches the character in action. An actor who plays a character must understand the character’s life up to the point the story takes place. This is called the “backstory.”

Backstory is critical to a performance because people operate on many levels, each level determined by our past. For example, a man may react when provoked in a bar fight differently if:

  1. He grew up in a poor neighborhood in a single-parent family. His father is in prison for murder and his mother is a drug addict who has resorted to a life of crime to support the family, or  .  .  .
  2. He grew up in a wealthy house where money was no object. His father is an attorney and his mother a congresswoman.

When creating a character’s backstory, determine:

  • How was the home life? What was the character’s relationship with parents, siblings, and extended family? What conflicts were there?
  • How was the character in school? What was the best memory of school? The worst memory? Was the character teased? Was he or she popular? An outcast? How did this affect the character later in life?
  • What is the character’s job history? Is he or she frustrated at work? Ambitious? Lazy? Always waiting for the big break?
  • Who are the character’s friends and enemies?
  • How did the character get to the point at which the story begins?

Although much of this backstory doesn’t appear in the script and will not appear on screen, it is critical to helping an actor determine how to play a role or how to react in a given situation if he fully knows and understands his character’s past.

Write out the backstory for every character in the story. Create a detailed character profile as if you were writing the character’s biography. In addition to broad points, create a variety of specific moments (scariest moment, happiest moment, a moment when the character experienced death) for the actor to refer to when on set.


How to Direct Inexperienced Actors

As independent filmmakers, we need to use the resources we have available.  Often times, those limitations extend to actors.  While it would be great if we could afford to hire SAG-AFTRA actors from a top agency for our projects, the reality is that we are forced to work with amateurs.  And part of the challenge of filmmaking is learning how to direct inexperienced actors.

Communicating with actors requires a finesse that will help the actors find the emotional and mental state needed to play a moment properly. Although the basics of acting seem simple, crafting the details of a performance requires a special level of trust and communication between the director and the actors.

  • Explain to the actors what production is like: slow, tedious, and repetitive. The more prepared they are for the experience, the better they’ll be. This is especially the case when working with inexperienced actors. Painting a picture of the realities of production will help them pace themselves and maintain a strong energy throughout the shoot.
  • Make sure the actors have their lines memorized before stepping on set. This will allow you to craft the subtleties and nuances of the scene without having to waste time and the actors’ energy.  Nothing is more draining than doing take after take because the actor forgot the lines.
  • Always give actors feedback on what they did correctly and what they need to change. Never begin another take without giving the actor something to work off of. Remember that as a director, you are their only lifeline, so go to them first with feedback as soon as you call “cut.”
  • Help the actors develop a purpose, or objective to attain, during the course of the shooting. “In the scene, all you want to do is get to the car, to get to the store before it closes in 10 minutes.”  That type of direction will add an underlying urgency to the moment.
  • Always help the actors stay RELAXED on set. Keep actors sheltered from any problems and issues on set. The more relaxed the actor, the better the performance.
  • Avoid saying phrases like “Just act natural” or “Just be yourself.” These phrases don’t give any meaningful insight or direction to the actor.
  • Be specific in your direction. “Hank, when Samantha approaches, don’t step back. Look her straight in the eye. It’s a challenge. Which of the two of you is in command of this moment? She thinks she is. You’re letting her know she’s not. It’s a power play.”
  • Don’t be negative when asking an actor to change a performance, but rather, put a positive spin on it. Don’t say, “I don’t want you to say that line so loud,” rather, say “Let’s try it again, but this time, try the line a little softer. I think it would be more effective in this moment because  .  .  .  .” NEVER say what they did wrong; suggest a way they could do it differently.
  • Encourage actors to remain in character, even when the camera isn’t rolling. The more comfortable they are in their role, the more convincing and real the performance will be. Set a place aside for the actors to go to between setups so they can practice their lines and prepare for the next moment.
  • The only person an actor should get advice from is the director. If crew members or other cast members feel free to give helpful acting suggestions, it will only undermine your relationship with the actors.
  • Avoid foreign dialects or accents unless an actor can speak them convincingly. Not only does a bad accent take the audience out of the moment, but it is also distracting for the actor. Often  times, he will be so focused on getting the accent right, that he won’t be focusing on the reality of the moment.
  • Be aware that working with children or animals increases the time and effort needed to get the shot.
  • The more you rehearse, the better the on-set performance. Help the actors prepare not only their lines, but also their character motivations.
  • After auditions, consider hosting a social event with both the cast and the crew to give everyone an opportunity to get acquainted with one another before you get to the set. You will find a tremendous improvement in quality and camaraderie.
  • Help the actor understand where the character was emotionally before and after the scene you are shooting. Because movies are shot out of order, it is important to establish and discuss the character arc of how a character got to this scene and where they are going after the scene.
  • Respect the fact that acting can be an emotionally stressful and trying process, especially with difficult scenes. Be sensitive to the actors’ needs and always be supportive.

Surviving Long Shooting Days on Set

We’ve all been on productions that seem to never end. 12-hour days turn into 14-hours, which turn into-16 hours. The shoot runs late into the night with no signs of ending, and everyone on the cast and crew is exhausted. Driving your crew into the ground is not only counter productive, it’s also dangerous.

Many non-union directors spend months – if not years – developing a project.  For them it’s a massive commitment of time and money, all enveloped by the pressure that that project could make or break their career. To the crew, it’s just another gig.  Many of the crew members came from a previous project and are going to begin work on another one, so constant late nights, bad food, or unhealthy working conditions take their toll very quickly.

As a producer, its important to maintain basic safeguards to ensure crew safety not only on set, but to and from it as well.  If you if you know you are going to be shooting late, consider the following practices to ensure a safe set.

  • Hire a wrap crew – If you’re shooting long hours, consider bringing in a second crew to help wrap up, restore the location, strike the set, and pack production equipment so that the main crew can leave on time. While this may seem like a luxury for larger budget projects, you can approach colleges and trade schools for production assistants and Interns who may be willing to invest their time.
  • Limit the length of each shooting day – Avoid shooting over 12 hours per day. The law of diminishing returns states that the longer the work day, the lower the quality of work.  When you start shooting past 12 hours, actors and crew get tired, morale drops, accidents happen, and overall productivity drops. You may “make your day,” but how good is the material you shot?
  • Ensure 12-hour turn around – Turnaround time is the time allotted from the end of a production day to the next day’s call time. Twelve hours is the recommended time to allow cast and crew the chance to drive home, sleep and prepare for the next day.  Many professional crew members expect 12-hour turnaround and may be hesitant to join a production is turnaround is any less.
  • Get hotel rooms – If shooting runs late and/or the location is too far for a reasonable commute, consider booking hotel rooms for the cast and crew.  it’s better to spend the money on cheap accommodations than risk an accident.
  • Second meal – Always provide a second meal for the cast and crew at the 12-hour mark in a production. The meal will not only help give everyone a boost, but follows industry-standard guidelines for meal breaks every 6 hours.
  • Show Dailies – Bring in dailies (the footage already shot) to show the cast and crew to help motivate them, especially if you have long shooting days. When people can see the fruits of their efforts, it always helps boots morale and re-ignite the excitement on set.
  • Pay overtime – If you can’t afford to pay overtime, show a gesture of appreciation like giving everyone a coffee gift card, especially if they are working for free or at a discounted rate. Small tokens of your appreciation are a great way to thank the cast and crew!

Overall, safety is the most important concern.  A tired crew won’t give you their best work, and will be a danger to themselves and others.  Always treat the people working with you well, and they will give the best they can to your and your production.

Choosing the Best Camera For Your Shoot

It’s time to start a new project, and the first question most people ask is “What camera should I use?” While professional cinematographers grimace when novice directors always want the latest and greatest camera, you should let the project decide the camera – not the hype.  Sure, the Alexa, Red Dragon, and BlackMagic all have a lot of sex appeal, but are the the right choice for the production you’re shooting?

When RED One was initially released, early adopters experienced overheating, codec incompatibility, and image problems when shooting in tungsten light.  It took over a year to resolve the issues, but cinematographers and their crews needed to change the shooting schedule and filmmaking process to adapt to these problems.  The process was a headache, but the marketing campaign was so effective that many filmmakers only wanted to shoot on RED cameras, simple to bask in the glamour of having one on set.

In addition to the camera itself, consider the lenses and accessories – which can be more expensive to rent than the camera body.  AC adapters, batteries, recording media, matte boxes and follow focuses, monitor support, and tripod heads all vary in cost based on the camera you choose.

When choosing the ideal camera package for your production, consider the following:

  • Determine the style of your movie – Renting a high-end 2k or 4k camera may be great for an action movie or a sprawling epic with lush vistas and sweeping visuals, but is it the best choice for a character drama in which you’ll be framing close-ups of the actors for most of the movie? Acquiring in 4k resolution may sound like a great idea until you realize that you can see every pore, wrinkle, and imperfection on your actor’s face in astonishing clarity. Will you need to spend money in the editing room softening or reducing the resolution of the image? Can you afford to build sets to the degree of detail necessary to look good in 4k?
  • Determine the exhibition format – I am constantly surprised by how many filmmakers choose high-end camera formats when the final product is output to standard definition DVD or streamed over the Internet. If you’re planning on a theatrical release or distribution on Blu-Ray, then higher resolution formats are perfect. For lower resolution deliverables, 720p or 1080p are more appropriate, less expensive options.
  • Ask the cinematographer’s advice – All too often, cinematographers are hired based on the camera package they own. Instead, hire a cinematographer for his or her skills, and rely on his expertise and suggestions when choosing the camera.
  • Determine the post-production cost – Consider the costs of data storage, transfer, back-up, and editing costs when choosing a camera format. The costs of working with Panasonic’s P2 DVCPro HD format are merely the price of an off-the-shelf hard drive and a basic home computer, whereas working with uncompressed footage shot on an Arri Alexa requires editing systems powerful enough to handle the data workflow. Although you may be able to edit on your home computer, the number of hard drives necessary to store and backup the footage can get costly.

Overall, consider the costs of the camera, accessories, and workflow when budgeting your next project.  It will not only help you production look better, but you wallet happier.